Everything to know about color workflow and profiles
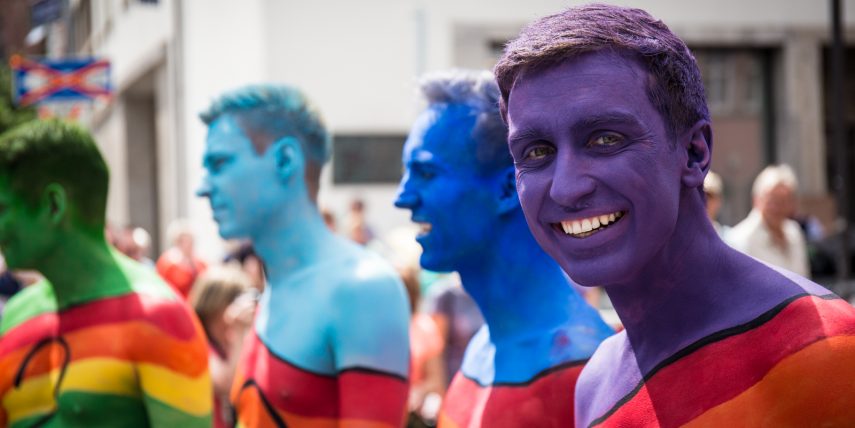
„My black and white prints are brownish. I’ll never buy these expensive ones from the local dealer!“ said Heinz-Günther and throw his 10€ prints in the trash. Don’t be like Heins-Günther. Edit it the right way with Color Profiles.
We saw already with the white balance post, why color is important, even if you shoot black and white. Now to a more result oriented topic: the proper color workflow. Keep in mind that different workflows have a different effect on your results. I’ll explain you, why it is important to take care of a mature workflow and stick to it, even if you shoot black and white.
Inhaltsverzeichnis
Key: Color Profiles
 No device in your digital color workflow shows the colors as the human eye sees them. Every single device has it’s own color space that describes the amount of colors the device can save, edit, or print. Some color spaces are larger than others. AdobeRGB (some camera models) is for example way larger than sRGB (most screens).
Besides that, every device describes color either additive, with RGB, or subtractive, with CMYK, color mode. Cameras and screens use RGB, printer CMYK.
Process
Based on that different color spaces, colors are seen different in variable viewing angles. Color Management Systems describe these differences with profiles, which level the gap in these spaces.
1: Shoot
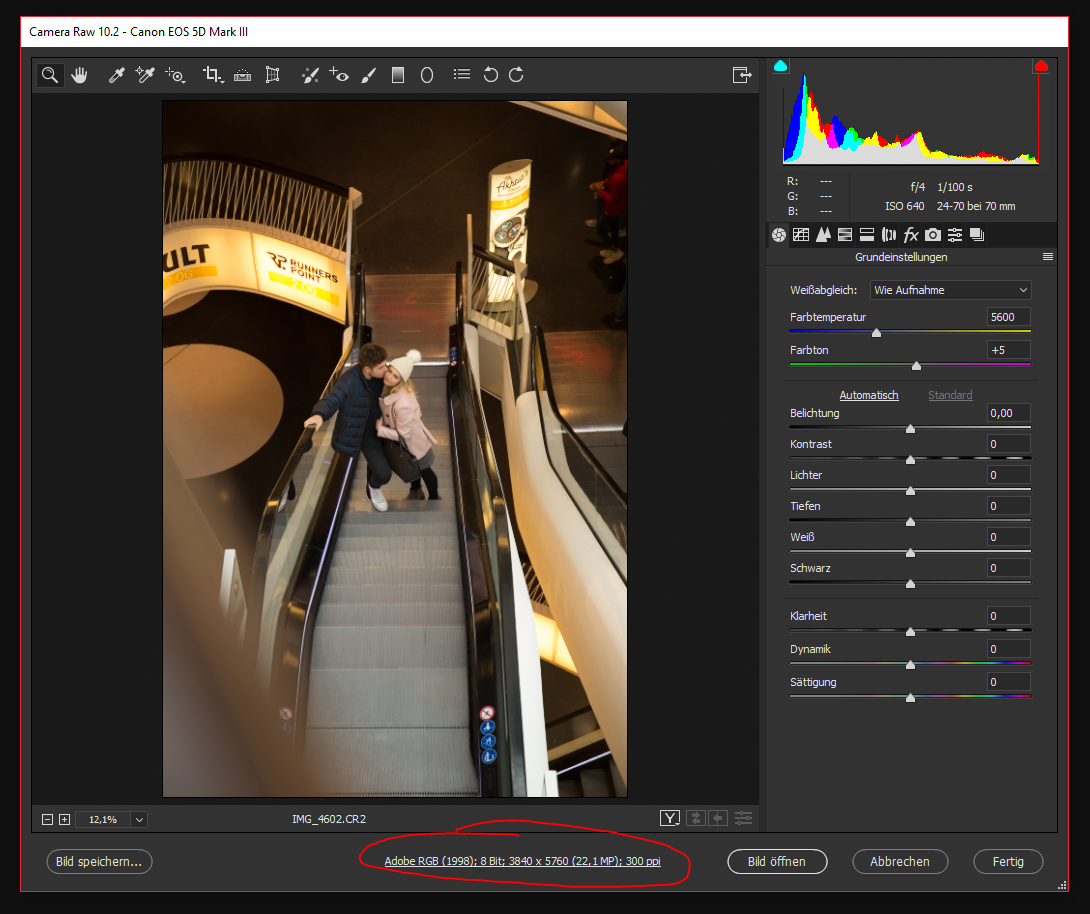
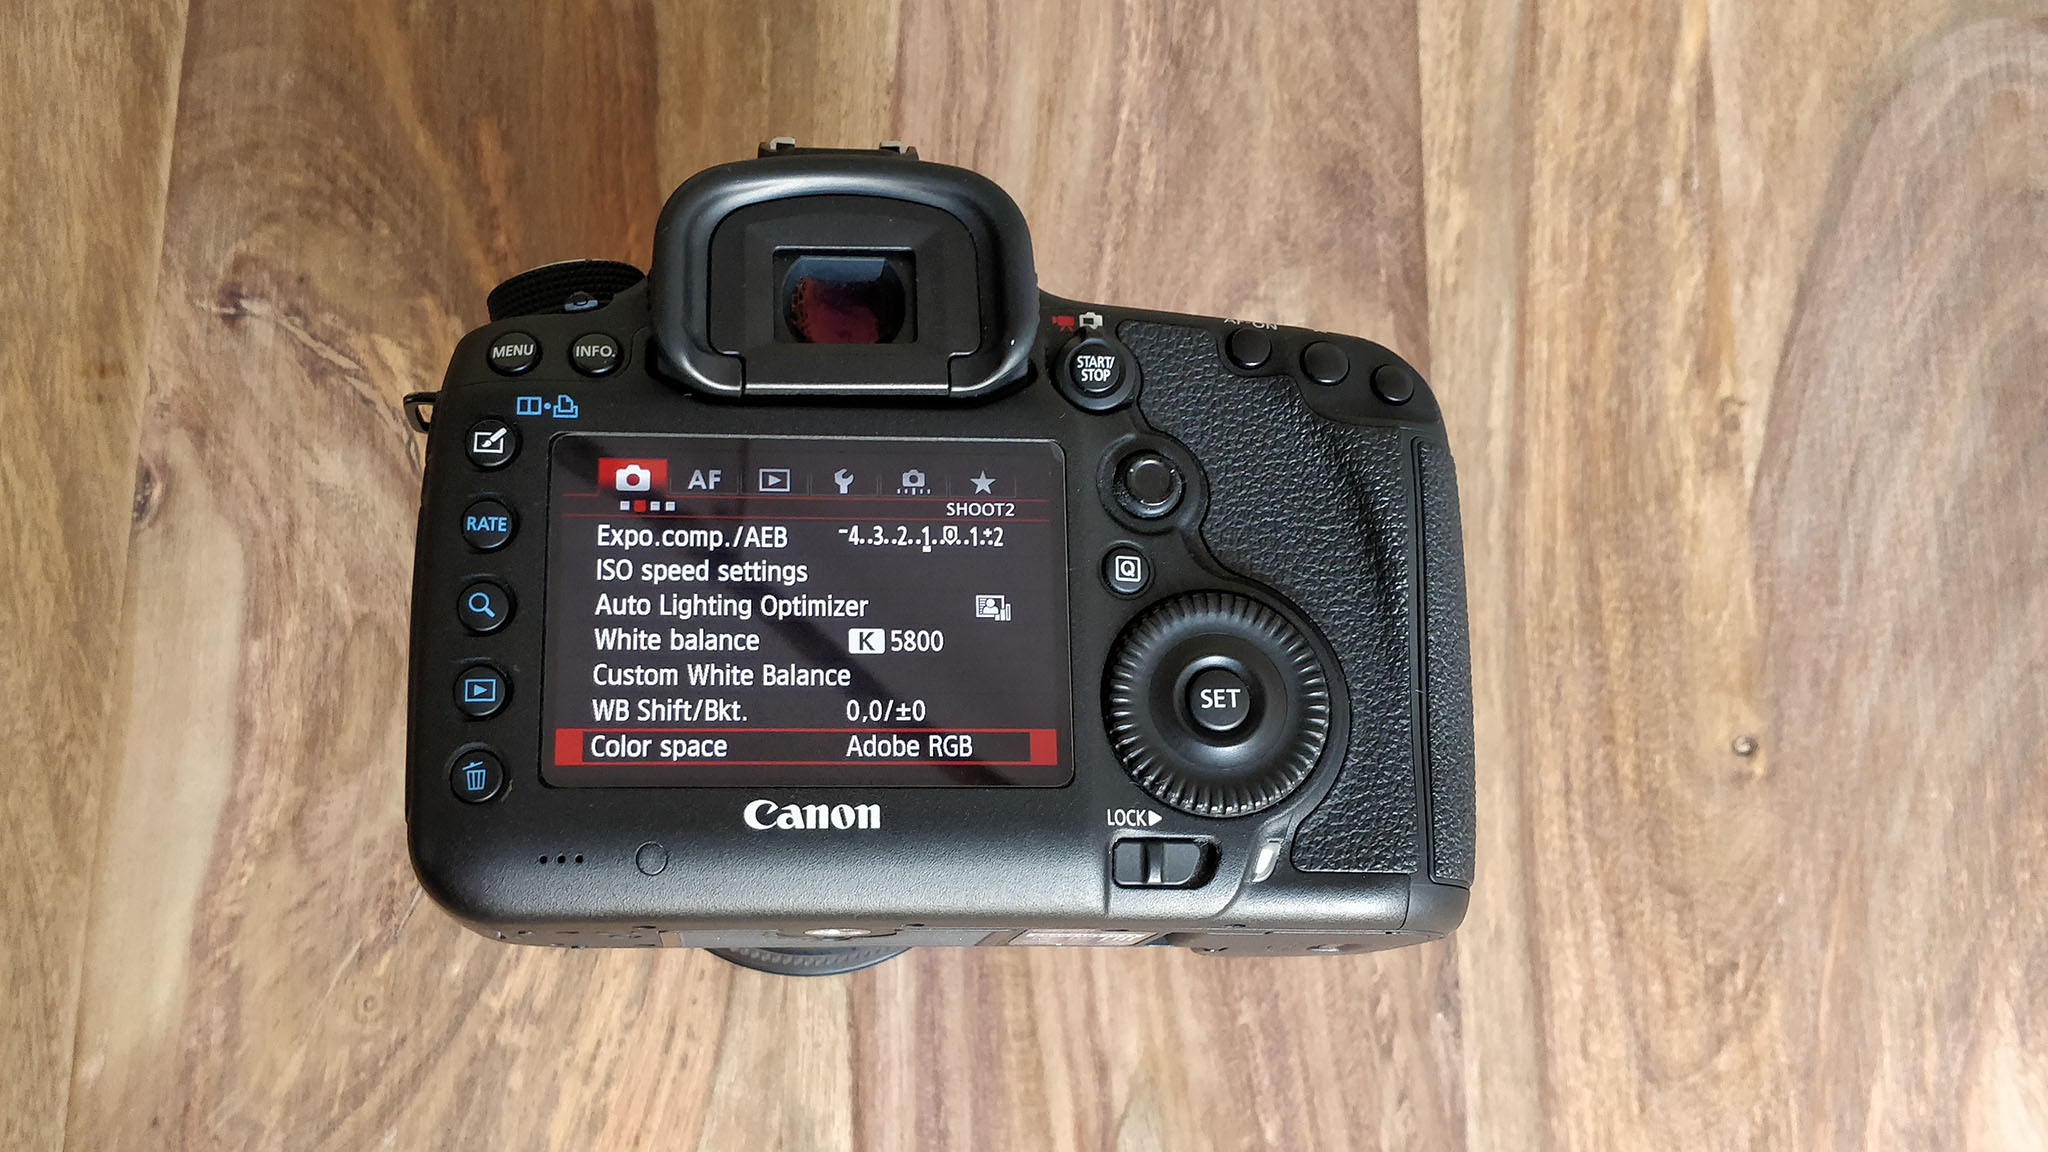 Depending on your camera model, it is possible to set either AdobeRGB, sRGB, or a proprietary RGB mode from your camera vendor. If your’re shooting in RAW, it doesn’t matter which color space you select, because a RAW images do not have a color space assigned to it at all. JPEGs and the further workflow will need them, so we setup this in the camera as well. We will come back to that later this text.
AdobeRGB describes a bigger color space than sRGB, but sRGB is built in most computers and can be displayed by 100% on most screens. So, this is the first decision you have to take. Your camera will include this in the files, stored on your card. Even if you use RAW format, the colors written in that file must be interpreted and displayed. Let’s stick at the moment to AdobeRGB.
2: Edit
 Now, you know you shoot with the AdobeRGB color profile and include that in your file. Coming to your computer.
Here, you have way more chain links to keep track. At first, you have your Operating System / Driver, then the Software and at the end the Monitor.
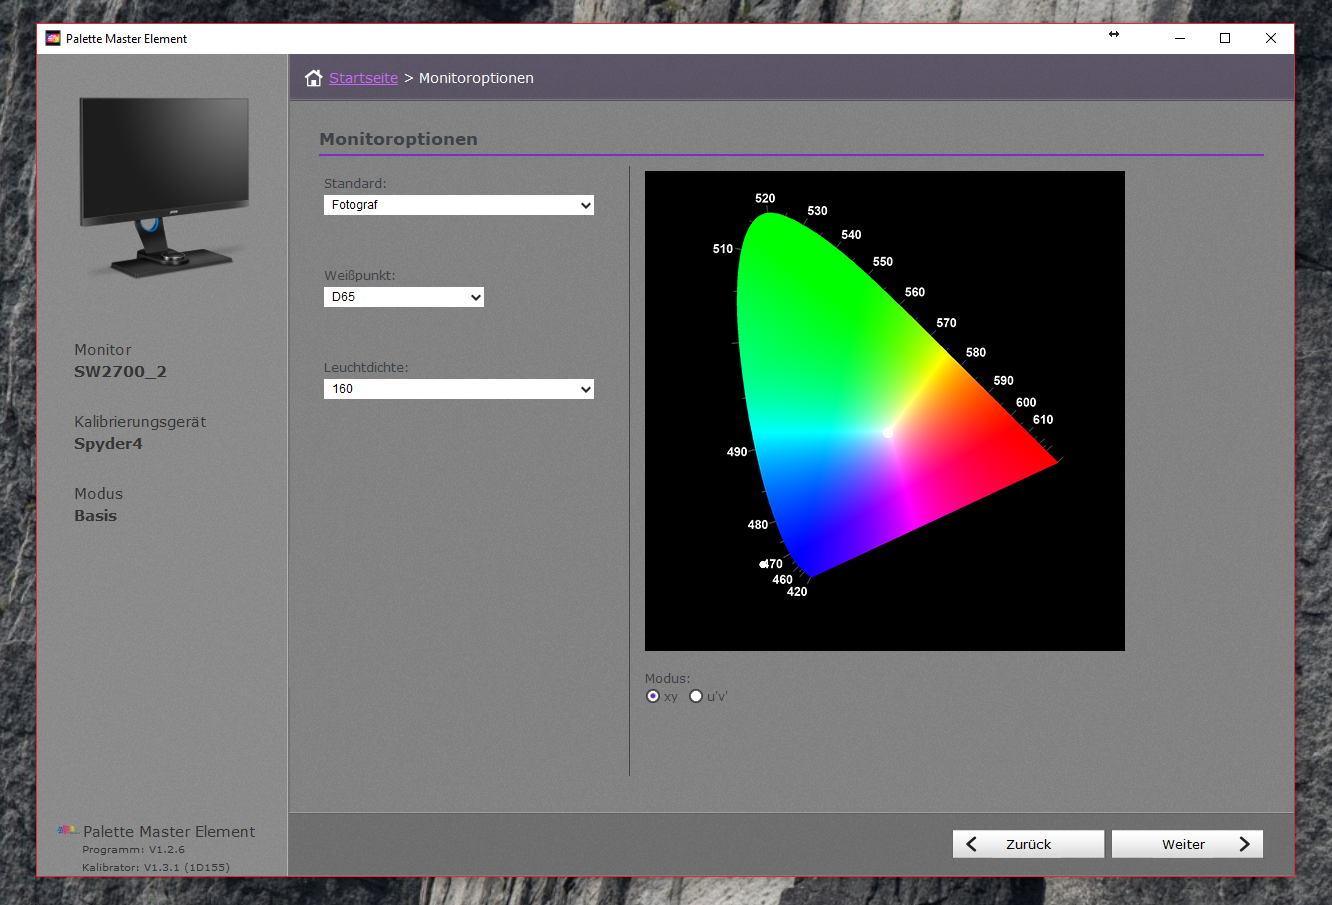
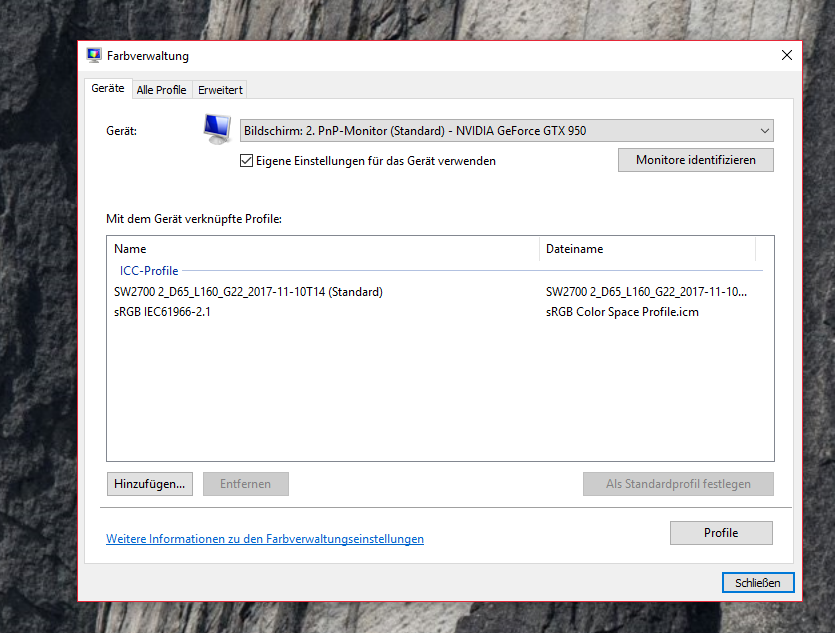
The graphics driver is controlled by your operating system. So we set this (in my Example Windows) in the appropriate configuration pane to AdobeRGB. The Windows on board picture viewer will have the appropriate color impression. In this particular case, my screens supports hardware color profiles. The Spyder colorimeter and Monitor Software write the profile into the hardware (Screen) and software (Windows). Not all screens support hardware profiles, therefore it is important to setup the OS level.
 After you configured the lower levels, it is time to adjust the editing software. I usually use the complete CC suite. Therefore I setup Adobe Bridge with the appropriate color profiles which gets synced across all applications like Photoshop, Lightroom, Illustrator or InDesign.
When you want to adjust it on your software, have a look in the settings or the right screenshot of Camera Raw. There you can see the prior set up color profiles from your camera in #Step1. Now, we’re good on the RGB front. Every pic from outside gets displayed on your computer’s screen correctly. Cool thing. Now, to your living room pictures.
3: Print
Printing is a complete different thing. There is a color conversion from one color space to another. As you read in the first few chapters, it is from RGB to CMYK. Nowadays most professional printing services use an advanced translation matrix that let’s them take control of the conversion in a real good way. Standard customers have no idea about color spaces. Therefore, Joe Average sends them the RGB files directly from his face swap app.
We care about correct color. Hence we need to know what to achieve. I want to print some of my stuff on uncoated natural paper. So, I have to find the correct CMYK profile for that material. As a German, I love standardization. Al least on process level. Therefore I go to ECI.org and download the latest version of the paper color profiles.
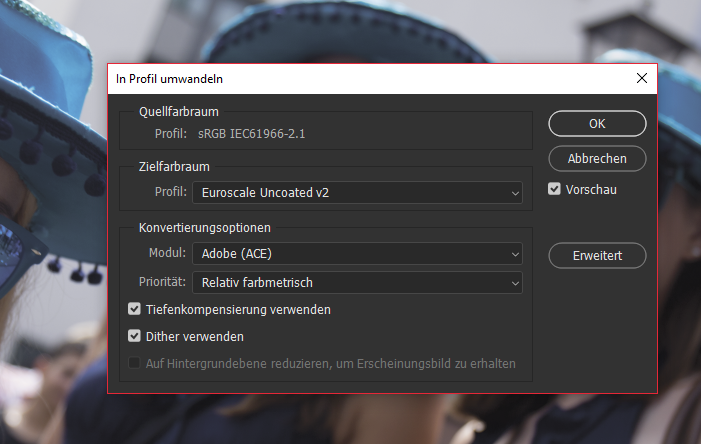 Equipped with that, I change in Photoshop the configuration from RGB to CMYK. Sometimes I adjust the colors a little. Keep in mind that CMYK is a smaller color space than RGB. So you get not that bright colors like on your screen. Thus it is from time to time needed to adjust e.g. green and red. Finally, I export a TIFF and send that to e.g. GM FOTO.
Summary
As you saw, the workflow itself is easy. You just have to know the steps and use only one profile. If you own a color reference monitor that supports AdobeRGB, you could proceed with the advantage of this profile from a Canon 5D III through the editing to the Print conversion. This brings a wider color space to the whole editing process. Personally, I would suggest to stick with sRGB, because most of the cheaper reference monitors support 100% of that room. In this case, it is also important fopr RAW.
Buy a colorimeter like the spider and calibrate your screen. Set in your camera the